
Introduction
Explanation of what spark plugs are and why they need to be changed
When it comes to car maintenance, changing spark plugs is a task that many people overlook. However, spark plugs are an essential component of your car’s ignition system and play a crucial role in keeping your engine running smoothly. In this guide, we will provide you with a step-by-step process for changing your spark plugs like a pro. Whether you’re a seasoned mechanic or a beginner looking to learn how to change spark plugs, this guide has got you covered. So, let’s dive in and get started!
Importance of changing spark plugs regularly
Spark plugs are small components that sit at the top of each cylinder in your car’s engine. They work by igniting the fuel and air mixture inside the cylinder, which creates the combustion necessary to power your engine. Over time, spark plugs can become worn or fouled, which can lead to a host of problems, including reduced fuel efficiency, decreased power, and even engine misfires. That’s why it’s important to change your spark plugs regularly, usually every 30,000 to 100,000 miles, depending on your car’s make and model.
Overview of the steps to change spark plugs
Changing spark plugs might sound intimidating, but it’s actually a relatively straightforward process that you can do yourself at home. By following a few simple steps, you can save money on labor costs and improve your car’s performance in the process. In the next section, we’ll go over the tools and materials you’ll need to get started.
Tools and Materials Needed
Before you start changing your spark plugs, you’ll need to gather some tools and materials. Here’s what you’ll need:
- Socket wrench: A socket wrench is a tool that is used to tighten or loosen nuts and bolts. You’ll need a socket wrench to remove the old spark plugs and install the new ones.
- Spark plug socket: A spark plug socket is a specialized socket that fits over the spark plug and allows you to remove it from the engine.
- Spark plug gap gauge: A spark plug gap gauge is a tool that is used to measure the distance between the two electrodes on the spark plug. It’s important to check the gap on your new spark plugs to ensure that they’re properly gapped for your engine.
- New set of spark plugs: You’ll need a new set of spark plugs to replace the old ones. Be sure to check your car’s owner’s manual or consult with a mechanic to find the right spark plugs for your car.
Once you’ve gathered all of the tools and materials you need, you’re ready to start changing your spark plugs. In the next section, we’ll go over how to locate your spark plugs.
Locating Your Spark Plugs
Consulting the car owner’s manual to find the location of the spark plugs
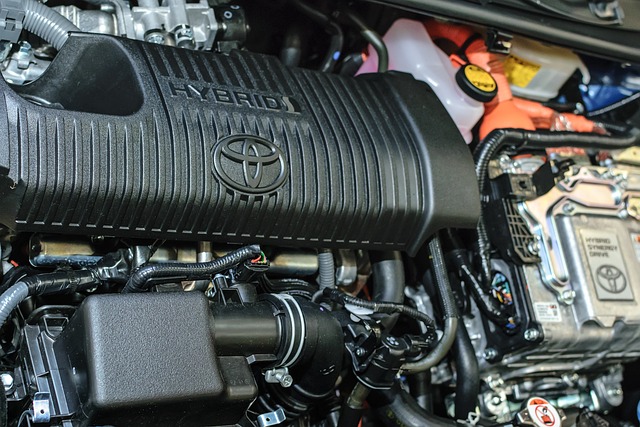
The first step in changing your spark plugs is to consult your car owner’s manual to find the location of the spark plugs. The location of the spark plugs can vary depending on the make and model of your car, so it’s important to refer to the manual to find the correct location. The manual will typically provide a diagram or description of the location of the spark plugs.
Identifying the spark plugs
Once you have located the spark plugs, you’ll need to identify them. The spark plugs are small, cylindrical objects with wires attached to them. They’re typically located on the top or sides of the engine. Look for a series of objects that match this description and have wires attached to them. In some cases, the spark plugs may be covered by a plastic cover that needs to be removed first.
Disconnecting the spark plug wires
After you have identified the spark plugs, the next step is to disconnect the spark plug wires. The spark plug wires are the wires that connect the spark plugs to the ignition system. To disconnect the spark plug wires, simply pull them gently by the boot at the end of the wire. Be careful not to pull on the wire itself, as this can damage the wire. It’s a good idea to mark each wire with a piece of tape or a marker to make sure they’re reconnected to the correct spark plug. Once you’ve disconnected the wires, you’re ready to remove the old spark plugs.
Removing the Old Spark Plugs
Preparing the spark plug socket and wrench
Before you can remove the old spark plugs, you’ll need to prepare your spark plug socket and wrench. A spark plug socket is a specialized socket designed to fit over the spark plug and allow you to remove it from the engine. Make sure you have the correct size spark plug socket for your engine’s spark plugs. You’ll also need a socket wrench to turn the socket and remove the spark plug. A socket wrench with an extension bar can help you reach spark plugs that are difficult to access.
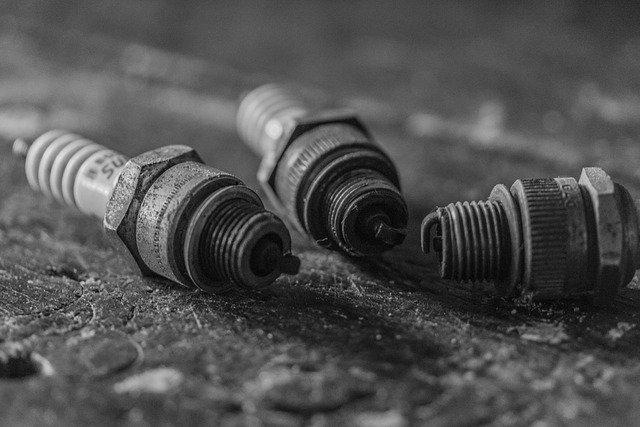
Carefully removing each spark plug
To remove the old spark plugs, use your spark plug socket and wrench to carefully turn the spark plug counterclockwise until it’s loose enough to remove by hand. Be careful not to force the spark plug, as this can damage the threads in the engine block. Once the spark plug is loose, carefully remove it from the engine by hand. If the spark plug is stuck, you may need to use a penetrating oil or a spark plug removal tool to help loosen it.
Keeping track of the condition and location of each spark plug
As you remove each spark plug, it’s important to keep track of the condition and location of each plug. Inspect each spark plug for signs of wear or damage, such as worn electrodes, cracked insulators, or excessive buildup of deposits. Make note of the location of each spark plug, as you’ll need to install the new spark plugs in the same order. It’s also a good idea to compare the old spark plugs to the specifications in your car’s owner’s manual to see if they’re due for replacement. If the old spark plugs are worn or damaged, it’s important to replace them to ensure optimal engine performance.
Checking the Spark Plug Gap
Importance of checking the spark plug gap
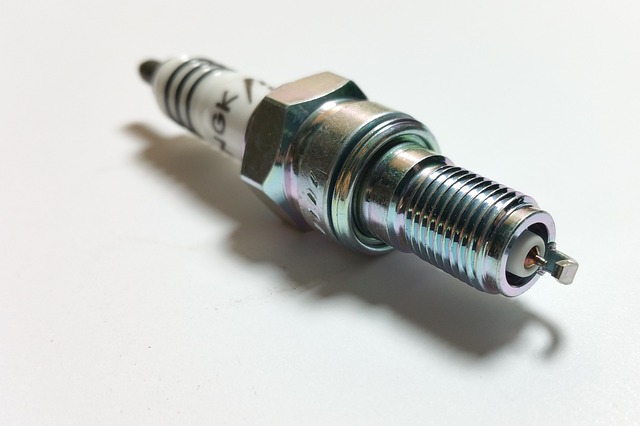
The gap between the center and ground electrode on a spark plug is a critical component of the ignition system. The gap must be set to the correct distance in order to ensure optimal engine performance. If the gap is too small, the spark may not be strong enough to ignite the fuel mixture. If the gap is too large, the spark may not occur at the correct time, leading to poor engine performance and reduced fuel economy. That’s why it’s important to check the spark plug gap and adjust it if necessary.
Using a spark plug gap gauge to measure the gap
To check the spark plug gap, you’ll need a spark plug gap gauge. This is a small tool that’s designed to measure the distance between the center and ground electrode on a spark plug. Simply insert the gauge between the electrodes and adjust the gap until it matches the specifications in your car’s owner’s manual. The gap specification can vary depending on the make and model of your car, so it’s important to refer to the manual to find the correct gap measurement.
Adjusting the gap if necessary
If the gap is too small or too large, you’ll need to adjust it. To adjust the gap, use a pair of needle-nose pliers to carefully bend the ground electrode until the gap is the correct distance. Be careful not to apply too much pressure or bend the electrode too far, as this can damage the spark plug. Once you’ve adjusted the gap, recheck it with your spark plug gap gauge to make sure it’s correct. It’s important to ensure that each spark plug has the correct gap, as this can have a significant impact on engine performance.
Installing the New Spark Plugs
Applying anti-seize lubricant to the threads of the new spark plugs
Before you install the new spark plugs, it’s a good idea to apply a small amount of anti-seize lubricant to the threads of each plug. This will help prevent the spark plugs from seizing in the engine block and make them easier to remove in the future. Be careful not to get any lubricant on the electrodes or insulator, as this can interfere with the spark and reduce engine performance.
Hand-tightening the new spark plugs
To install the new spark plugs, carefully thread each plug into the engine block by hand. It’s important to make sure each spark plug is started correctly and threaded straight, to avoid cross-threading the plug. Once each plug is started, use your spark plug socket and wrench to carefully tighten each plug by hand. Be careful not to over-tighten the spark plugs, as this can damage the threads in the engine block.
Tightening the spark plugs with a torque wrench
Finally, use a torque wrench to tighten each spark plug to the specifications listed in your car’s owner’s manual. The torque specification can vary depending on the make and model of your car, so it’s important to refer to the manual to find the correct torque setting. Tightening the spark plugs to the correct torque is important, as it ensures that the plugs are secure and will not loosen over time. It also helps prevent damage to the threads in the engine block. Once you’ve tightened each spark plug to the correct torque, double-check the gap with your spark plug gap gauge to ensure that it’s still correct.
Reconnecting the Spark Plug Wires
Placing the spark plug wires back in their original location
Now that the new spark plugs are installed, it’s time to reconnect the spark plug wires. Start by placing each spark plug wire back in its original location. It’s important to make sure each wire is connected to the correct spark plug, as this can affect engine performance. If you’re not sure which wire goes where, consult your car’s owner’s manual for a diagram or labeling.
Pushing the spark plug wires onto the new spark plugs
Once you’ve identified the correct location for each spark plug wire, push the wire onto the corresponding spark plug until it clicks into place. You should feel a slight resistance as you push the wire onto the plug. This means that the wire is securely connected and will not come loose while driving. Repeat this process for each spark plug wire, until all wires are securely connected to their respective plugs.
Testing Your Work

Turning on the engine and checking for any issues
After you’ve finished changing the spark plugs and reconnecting the spark plug wires, it’s important to test your work. Start by turning on the engine and letting it run for a few minutes. Listen for any unusual sounds or vibrations, which could indicate that there’s an issue with the new spark plugs. Check the engine for any signs of misfiring or rough idling, which could also indicate a problem. If you notice any issues, turn off the engine and double-check your work before attempting to drive the car.
Double-checking that all the spark plug wires are connected properly
One common mistake when changing spark plugs is connecting the wires to the wrong plugs. If the spark plug wires are connected incorrectly, the engine may not run at all or could run poorly. To double-check that all the spark plug wires are connected properly, look for any wires that are not seated correctly or appear loose. You can also use a spark plug tester or multimeter to check that each plug is receiving the correct amount of voltage.
Conclusion
Congratulations, you have successfully changed the spark plugs in your car! With the new spark plugs installed, your engine should run smoother and more efficiently, providing improved performance and fuel economy. Remember to keep track of when you last changed your spark plugs, as regular maintenance is key to keeping your car running smoothly for years to come.